
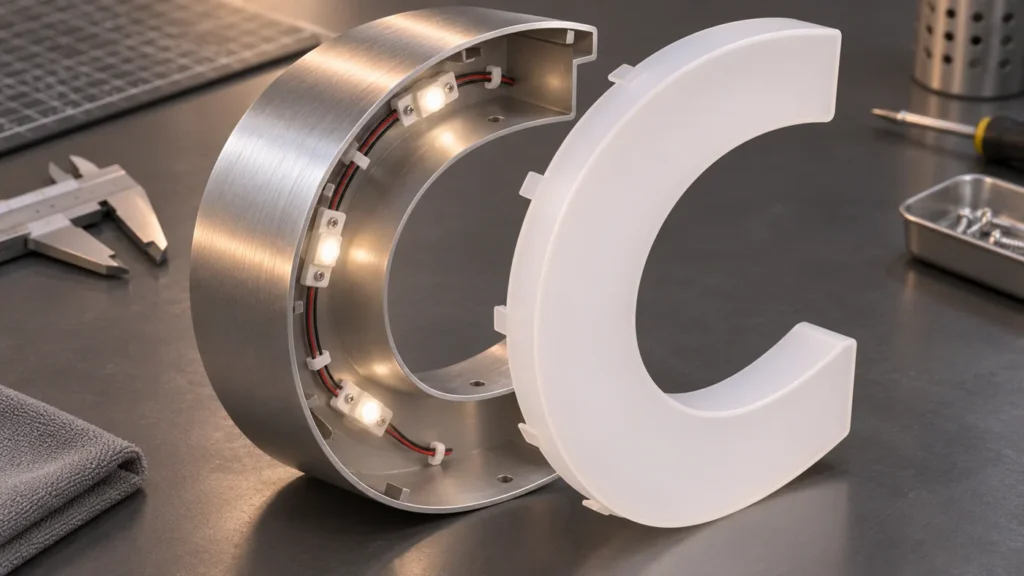
A curved letter face can look simple on a screen while asking a great deal from the finished sign. The metal housing, illuminated panel and mounting arrangement must agree in three dimensions. Removing a visible trim cap also makes the relationship between the face and the return especially noticeable. A small mismatch can interrupt the intended outline even when every individual component appears well made.
For a buyer specifying channel letters, the useful starting point is a coordinated construction drawing rather than a promise that any logo can be made exactly as pictured. Describe the intended appearance, then let the manufacturer identify which curves, joints and face details need a physical trial.
Begin with the geometry that will actually be built
A logo file describes the visible shape, but it does not necessarily define the return depth, face profile or support behind the sign. Ask for a drawing that connects the front elevation to relevant side views. If the face curves away from a flat plane, the drawing should show that curvature and the relationship between adjoining pieces. Confirm whether the proposed shape comes from a flat cut panel, a formed panel or another agreed fabrication method.
Decide which dimensions are critical to the brand. Overall width, letter spacing, a distinctive inside corner and the position of a logo element may deserve separate approval. Measurements taken from a photograph are useful for discussion, but they should not silently become production dimensions. Record the approved drawing revision so the sample and the eventual order can be compared with the same reference.
Let the acrylic method inform the fit
ACRYLITE’s thermoforming guidance explains that acrylic behaviour during heating, cooling and forming depends on the material and process. Its sign-grade fabrication manual also treats machining and handling as part of achieving a usable component. These are reasons to confirm the actual acrylic grade and fabrication route; they are not a basis for prescribing one universal forming temperature or clearance for every sign.
The face of front lit led channel letters must work with its housing after fabrication, not merely overlap the outline in a vector file. Ask how the manufacturer checks the panel perimeter, corner detail and seating arrangement. A sample may reveal a practical joint or construction change that is difficult to assess in a rendering. Make that decision before the full set is produced.
| Approval item | What to compare | Useful record |
|---|---|---|
| Shape and curvature | Front outline and side profile | Drawing revision and key dimensions |
| Face-to-housing fit | Panel seating, perimeter and joints | Close photographs and sample notes |
| Illuminated appearance | Brightness distribution and edge detail | Daylight and lit sample views |
| Assembly | Fastening, cable route and service access | Agreed construction detail |
Approve the unlit and illuminated result
A trimless sign is seen during the day as well as after dark. Review the unlit face color, metal finish and visible edges separately from the light effect. Then inspect a lit sample from the expected viewing direction. Exposure-adjusted photographs can make two different brightness levels appear similar, so request consistent photography and discuss any area that is difficult to judge remotely.
Fine elements may require a different construction from broad strokes. If part of the design approaches the scale of acrylic led letters, ask whether the same face treatment and lighting arrangement remain suitable. The goal is to keep the visual language consistent while accepting that every letter need not contain identical internal parts. A representative difficult character is often more informative than the easiest letter in the word.
Agree how the assembly can be supported and serviced
The desired appearance should be reviewed alongside installation and maintenance. Confirm the mounting points, supporting structure and space needed to handle the completed sign. Discuss how the face or another access point can be opened if service is needed. An elegant joint that cannot be accessed at the installed location creates a problem that a product photograph will not reveal.
Before approval, collect the drawing, sample comments and finish reference in one project record. Separate accepted variations from changes still under discussion. If a prototype leads to a new face detail, update the drawing as well as the email conversation. That makes the final production decision clear to the buyer, fabricator and installer.
A practical approval sequence
Start with the outline and three-dimensional construction, review the proposed material and fabrication method, then examine a representative fit-checked and illuminated sample. Confirm installation interfaces before authorizing the complete set. This sequence does not remove every production variable, but it helps expose the decisions that deserve attention while changes are still manageable.
Frequently Asked Questions
Does every curved sign require thermoformed acrylic?
No. The shape and construction determine the appropriate route. Ask the manufacturer to explain whether the proposed face is cut flat, formed or made using another agreed method.
Which letter should be sampled first?
Choose a representative difficult element, such as a tight curve, narrow stroke or complex junction. It should test the construction challenges of the actual design rather than only its simplest shape.
Can a rendering replace a physical fit check?
A rendering communicates appearance but does not establish the fit of manufactured parts. Use drawings for dimensions and a suitable sample to review details that remain uncertain.
Technical References
ACRYLITE Thermoforming; ACRYLITE LED Sign Grade Fabrication Information.
Discuss Your Project
Share your artwork, approximate dimensions, installation location and delivery country with HLW Sign. Contact our team for a project-specific review and quotation.