
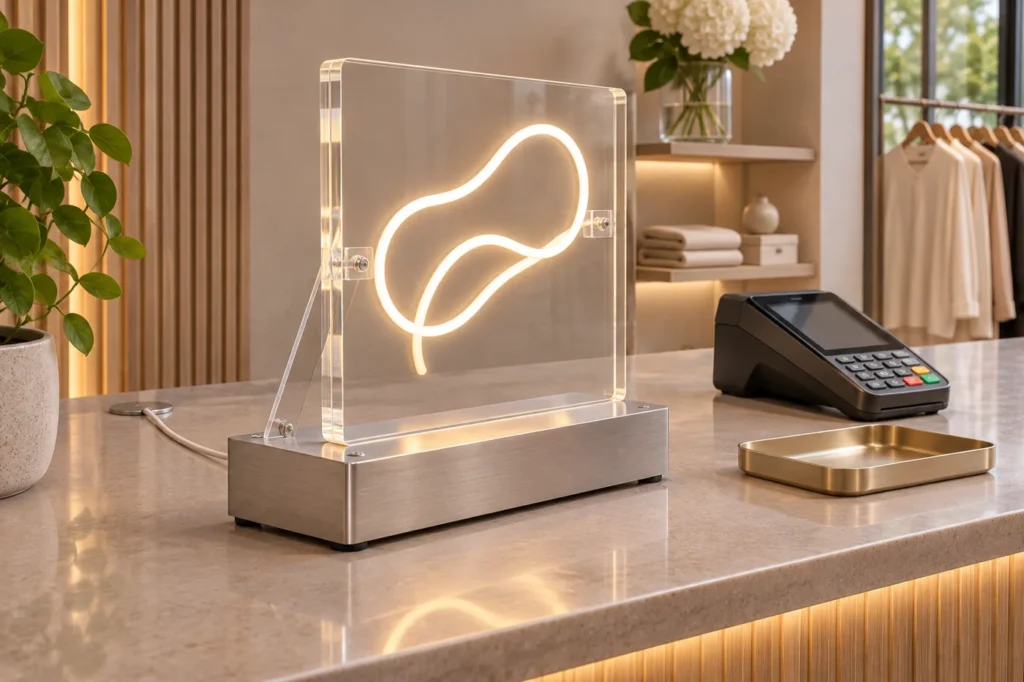
A countertop neon display must fit the counter as a complete object, not just as a glowing logo. The support base, panel depth, cable exit and power-supply position all use space that may be missing from a front-view artwork. For a reception desk, retail checkout or hospitality counter, establish the full footprint before you approve the drawing. This protects the display area without discovering too late that the base obstructs equipment or staff movement.
Measure the working area first
Record the available width and depth, the counter height and the objects that must remain nearby. Include payment equipment, merchandise, paperwork and cleaning access. Photograph the counter from the customer side and from the staff side. A usable brief shows where the sign can stand during normal operation rather than a temporary empty surface. Mark any area that must remain clear, and identify whether the display will be moved at closing time.
Request dimensions for the complete assembly
Ask for the illuminated artwork dimensions and the outside dimensions of the support or base. Include the front-to-back projection of any angled stand. A large logo with a shallow outline can still have a substantial base, while a small panel can require space behind it for a connector. For custom neon light signs, confirm that a freestanding support is part of the quotation rather than inferred from a wall-mounted product image.
Review the intended viewing directions
Customers may see the display head-on, from a queue, across a room or from the end of the counter. A front-only approval can miss visible hardware, reverse-side lettering or cable loops. Ask which surfaces are finished and what the rear view will look like. If the logo needs a solid illuminated face instead of an outline, discuss illuminated logo signs as another construction, with its own base and viewing requirements.
| Area to confirm | Useful detail | Approval evidence |
|---|---|---|
| Base footprint | Outside width, depth and projection | Dimensioned side and plan views |
| Customer view | Viewing direction and sign height | Counter photograph with outline |
| Staff area | Equipment, reach and cleaning space | Marked no-obstruction zones |
| Power route | Cable exit and supply position | Connector and cable-route drawing |
Plan power without creating a snag point
Locate the intended outlet and the place where the power supply can be used under its specified conditions. Identify where the cable leaves the sign and where it crosses, enters or runs beneath the counter. Do not assume battery operation, a particular cable length or an invisible rear connection. Any electrical work or changes to the site should be handled by the appropriate qualified person. The sign drawing should describe the agreed route clearly enough to check on arrival.
Check support details with the manufacturer
A photograph does not establish stability or a load rating. Discuss the complete assembly and how it will be used: a quiet reception desk is a different setting from a frequently handled event counter. Fixing holes and panel details also affect fabrication; ACRYLITE’s drilling guidance illustrates why acrylic fabrication is material specific. This is a reason to resolve the support design before production, not a substitute for reviewing the actual stand.
Use a simple placement trial
A cardboard outline of the base and a printed front elevation can reveal conflicts before a finished sample is made. For a compact, detailed logo, illuminated mini acrylic letters may be worth discussing, but their dimensions and support still need confirmation. When a physical sample is available, place it at the intended counter, check customer sightlines and demonstrate how staff will clean, move and reconnect it without stressing the panel or lead.
Frequently asked questions
Is the artwork width the same as the display width?
Not necessarily. The support, mounting hardware or base can extend beyond the artwork. Request the complete outside dimensions and a side view of the proposed assembly.
Can every wall-mounted neon sign stand on a counter?
No. A freestanding display needs an appropriate support design. Confirm whether the product can be specified that way and which parts are included in the quotation.
Does a bigger base always solve stability concerns?
Do not decide from base area alone. The full assembly, use conditions and support design need review. Avoid adding an improvised base after the sign has been approved.
Plan your sign with HLW Sign
Share counter dimensions, front and rear photographs, the intended viewing directions and the available power route. We can review an appropriate display construction for the space. Send your project details to discuss a suitable construction and quotation.