
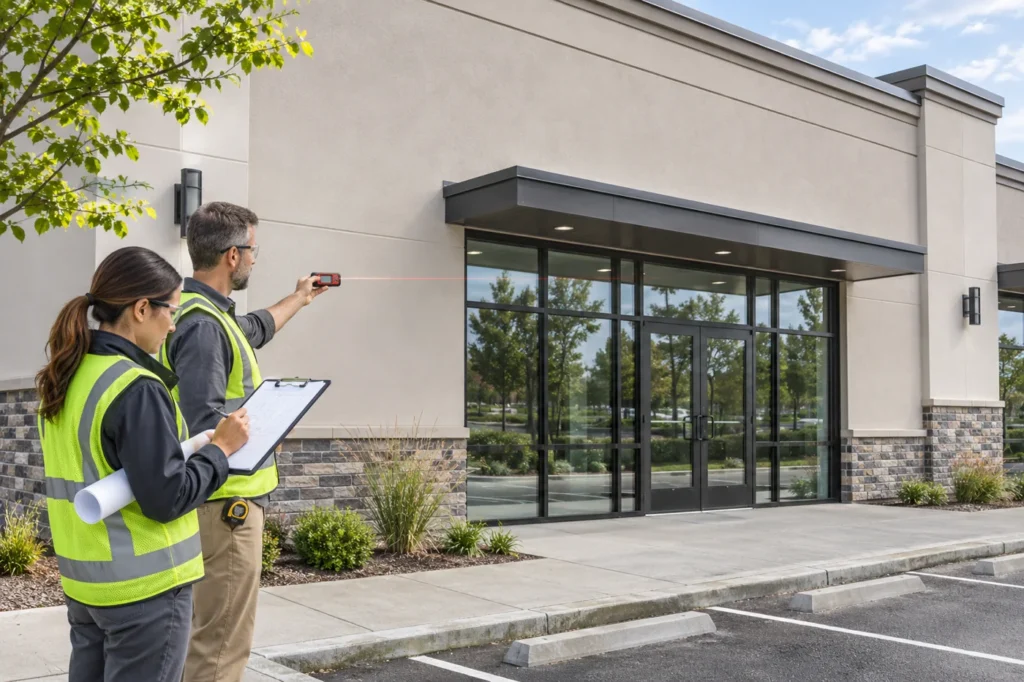
A sign can leave the factory in good condition and still encounter avoidable installation delays. The wall may differ from the photograph, a service route may be inaccessible, or the delivery vehicle may not reach the planned unloading point. A channel letter site survey turns these assumptions into a shared set of facts before the sign is manufactured.
The survey does not replace an installer’s assessment or a structural design. Its purpose is to give the people responsible for those decisions a clear description of the location. That matters whether the project uses illuminated channel letters or a simpler set of dimensional lettering.
Record the actual installation area
Begin with a straight-on view of the whole sign zone, followed by closer photographs of the relevant surfaces and surrounding features. Include a reliable measurement reference and identify where each photograph was taken. Record the available overall width and height, obstacles, nearby doors and windows, and any features that must remain accessible after installation.
Photographs can hide changes in depth and surface condition. Note cladding joints, projections, existing holes, visible cracking and areas that cannot be inspected. Describe an unknown wall as unknown rather than inferring its construction from the finish. A decorative outer panel may not tell the installer what is available behind it for a suitable attachment.
Separate appearance information from fixing decisions
Hilti’s anchor-selection guidance identifies base material, loading, environmental conditions and installation limitations among the factors that affect anchor selection. This means a photograph of an attractive facade is not enough to choose a fixing. Provide the available building information to the installer and ask what additional investigation is required for the particular sign and location.
For metal wall letters installations, the survey should identify the intended position and any visible constraints without inventing a universal screw size or drilling pattern. For a larger illuminated assembly, distinguish the proposed mounting arrangement from the final approved fixing design. Keep responsibility for the latter with the appropriate site professional.
| Survey area | Information to record | Who should review it |
|---|---|---|
| Sign zone | Measured space, photographs and obstructions | Buyer and fabricator |
| Wall condition | Known construction and unresolved areas | Installer or relevant designer |
| Working access | Height, ground conditions and public access | Installation contractor |
| Services | Known supply position and accessible routes | Qualified electrical installer |
| Delivery | Unloading location and handling restrictions | Site team and logistics provider |
Plan the work area, not just the finished view
Record how installers can reach the sign zone and where equipment could be positioned. Note slopes, steps, parked vehicles, pedestrian routes and operating hours that may affect access. If the site is busy, arrange for the responsible contractor to review how the work area will be managed. Do not assume that the equipment used on a previous storefront will suit this one.
HSE’s scaffold guidance discusses planning, access, competent supervision and inspection. It is a useful reminder that access equipment is a separate work-planning subject. A buyer’s survey should identify constraints early, while the installation contractor determines the appropriate equipment, safe work arrangements and local requirements.
Include electrical and service access
For front lit storefront signs, record any known supply point and photograph the areas where the installer expects to route cables or locate equipment. Clearly distinguish an existing service that has been verified from a proposed position. If the ceiling, wall interior or adjacent tenancy is inaccessible, say so before a construction is approved around that space.
Think beyond the first installation. A power supply or connection may eventually need inspection, so ask how the agreed location can be accessed after the sign is fitted. For a backlit logo sign, also photograph the wall finish that will receive the halo. Surface texture and nearby features are useful appearance information even though the electrical and fixing arrangements need their own review.
Make delivery and handover part of readiness
Check the route from the unloading point to the installation area. Door sizes, stairs, lifts and temporary storage can affect how a large assembly is delivered or handled. Share restrictions with the fabricator before packaging is finalized, especially when the order may arrive in several sections. Agree who will receive the shipment and inspect the packing condition.
Finish the survey with a short unresolved-items list. Assign a person to confirm each item and record which answers are needed before manufacture or installation. A dated survey, a consistent drawing revision and clear site photographs provide a stronger handover than a long conversation spread across unrelated messages.
Frequently Asked Questions
Can a site survey be completed from photographs alone?
Photographs are useful, but they may not establish wall construction, service availability or equipment access. Ask the installer which measurements or physical checks are still needed.
Should the manufacturer choose the wall fixings?
The manufacturer can describe the sign and its mounting interfaces. Final fixing decisions need the actual site conditions and should be reviewed by the responsible qualified installer or designer.
When should the survey take place?
Before the construction is finalized, with a further check if the building, access arrangements or sign position changes. Keep the survey aligned with the approved drawing revision.
Technical References
Hilti: Selecting the right post-installed anchor; HSE: Scaffolds and access planning.
Discuss Your Project
Share your artwork, approximate dimensions, installation location and delivery country with HLW Sign. Contact our team for a project-specific review and quotation.